Berin Kocabas
Gen AI
Meta SAM 2
LaMa Inpainting
React & Node.js


Disclaimer: This project is an educational demonstration and a personal exploration of creative technology, not affiliated with Amazon Prime.
The Objective
One of the greatest advantages of Generative AI is its ability to eliminate highly repetitive, time-intensive workflows, allowing teams to scale output rapidly. For this project, my goal was to build a custom, automated pipeline from scratch that takes a standard 2D promotional asset (like a movie poster) and automatically processes it into a layered, 2.5D interactive HTML parallax experience.
To demonstrate both technical execution and scalable leadership, this case study is divided into two parts:
Part 1: Building the AI Pipeline: A deep dive into how I engineered the workflow, debugged AI models, and solved technical hurdles to achieve production-ready quality.
Part 2: The Designer’s Playbook: A streamlined operational guide demonstrating how a Prime Video designer would actually interact with this tool to generate campaigns in minutes, without touching a line of code.
The Pipeline & Toolkit
This project leverages Large Language Models not just for ideation, but as direct programming copilots to construct a custom software solution. While enterprise-grade tools exist for commercial deployment, this project utilizes open-source models to demonstrate a fundamental understanding of the underlying technology.
Gemini 3.1 Pro (Web & CLI): Used as the primary NLP interface for strategic problem-solving, and as the integrated coding agent to write, debug, and execute Python and React scripts locally.
Meta SAM 2 (Segment Anything Model): An open-source segmentation model implemented to auto-detect and cleanly extract specific foreground subjects.
Stable Diffusion 1.5 & LaMa: Explored SD 1.5 for inpainting, but successfully pivoted to LaMa (Large Mask Inpainting) to intelligently heal and reconstruct the background post-extraction.
React & Node.js: Used to build the final interactive User Interface and compile the parallax scrolling logic.
Part 1: Building the AI Pipeline
Step 1: Initializing the Development Environment
To begin, I set up the local development environment and initialized my AI coding helpers.
1. Environment Installation
Downloaded the Node.js Windows installer (.msi) and followed the setup wizard to install Node.js and npm. Verified installation by running node -v and npm -v in Terminal. Created a dedicated project workspace folder on local machine. Navigated to project directory in terminal using cd /path/to/workspace. Initialized Gemini CLI by typing gemini in terminal and completing authentication.
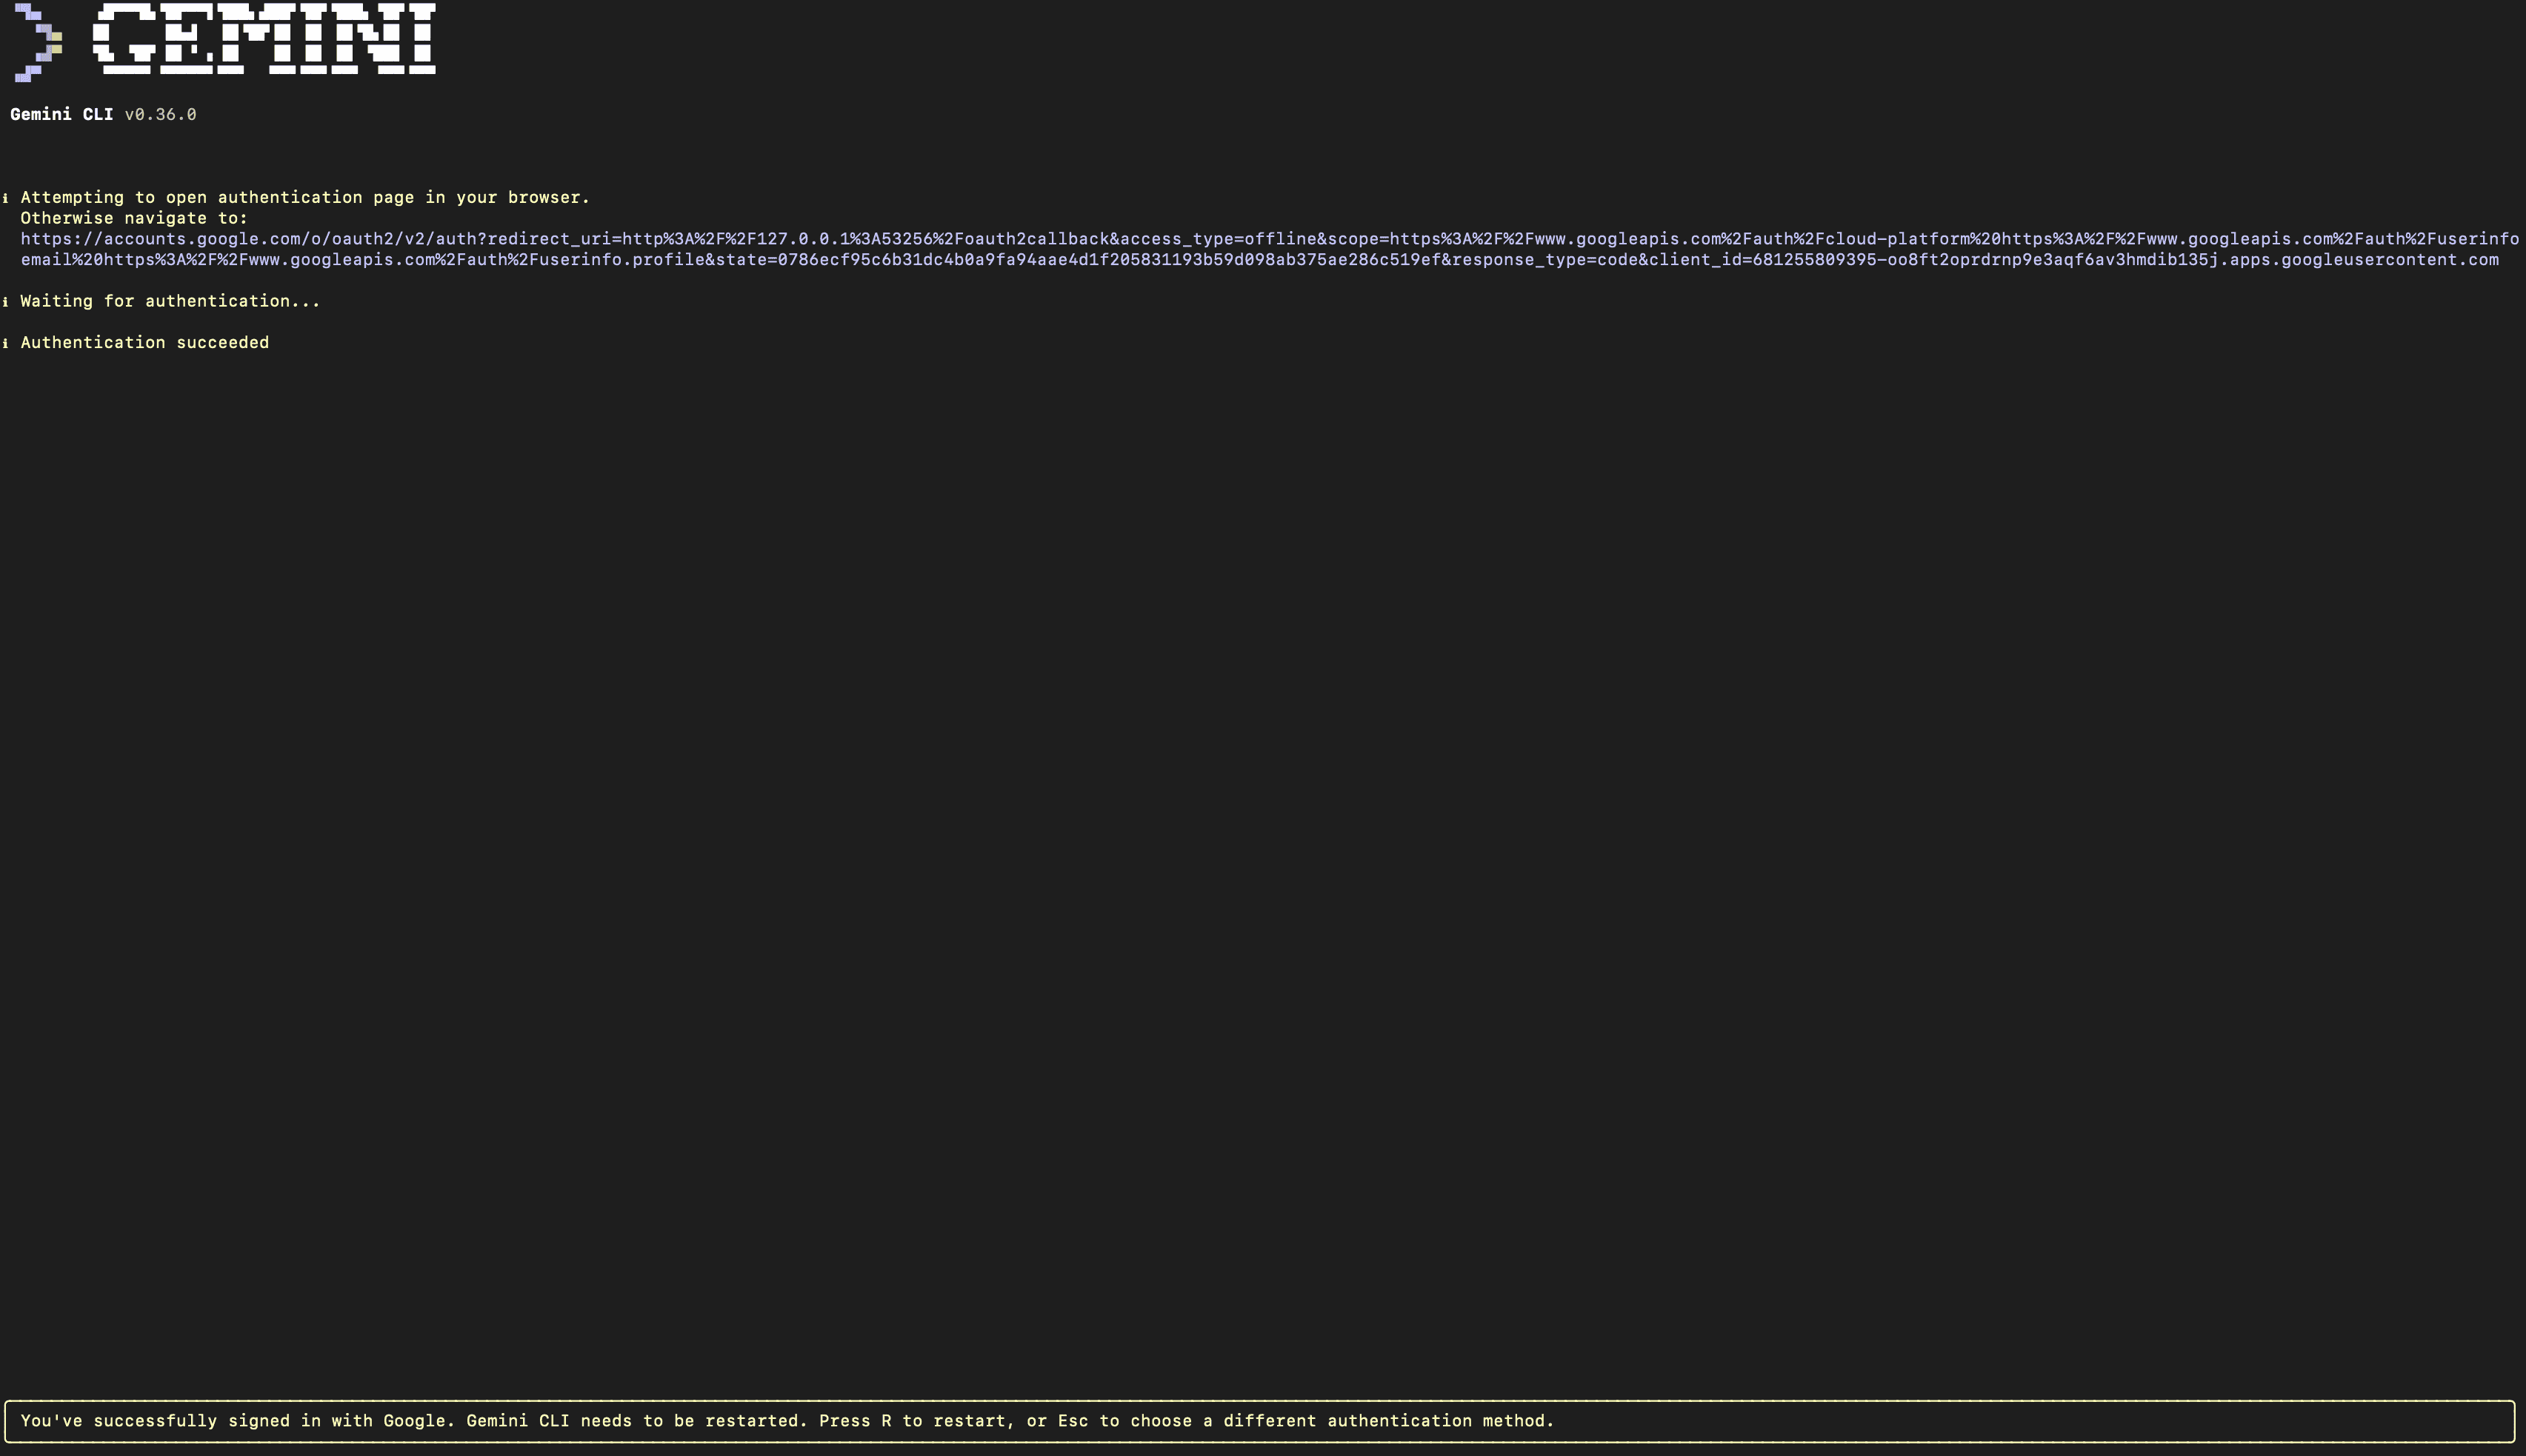
2. Agent Configuration & Prompting
Configured Gemini CLI with YOLO mode enabled for autonomous file creation and execution. Created initial system prompt in Gemini Web to structure project architecture and core workflow requirements. Copied structured prompt from Gemini Web into Gemini CLI. Executed prompt in Gemini CLI to auto-generate baseline Python project structure and dependencies.

Step 2: First Steps & Basic Extraction
The initial test run of the code was a complete failure because it provided no visual feedback. I needed to build a way to select assets visually.
1. Building the Visual Interface
Ran script via Gemini CLI to initialize image processing pipeline. Code executed but provided no visual output or window to select foreground subject. Prompted Gemini CLI to integrate OpenCV/Matplotlib window for interactive coordinate selection. Re-ran updated script; interactive window opened displaying input poster.

2. Copilot Workflow & Asset Extractions
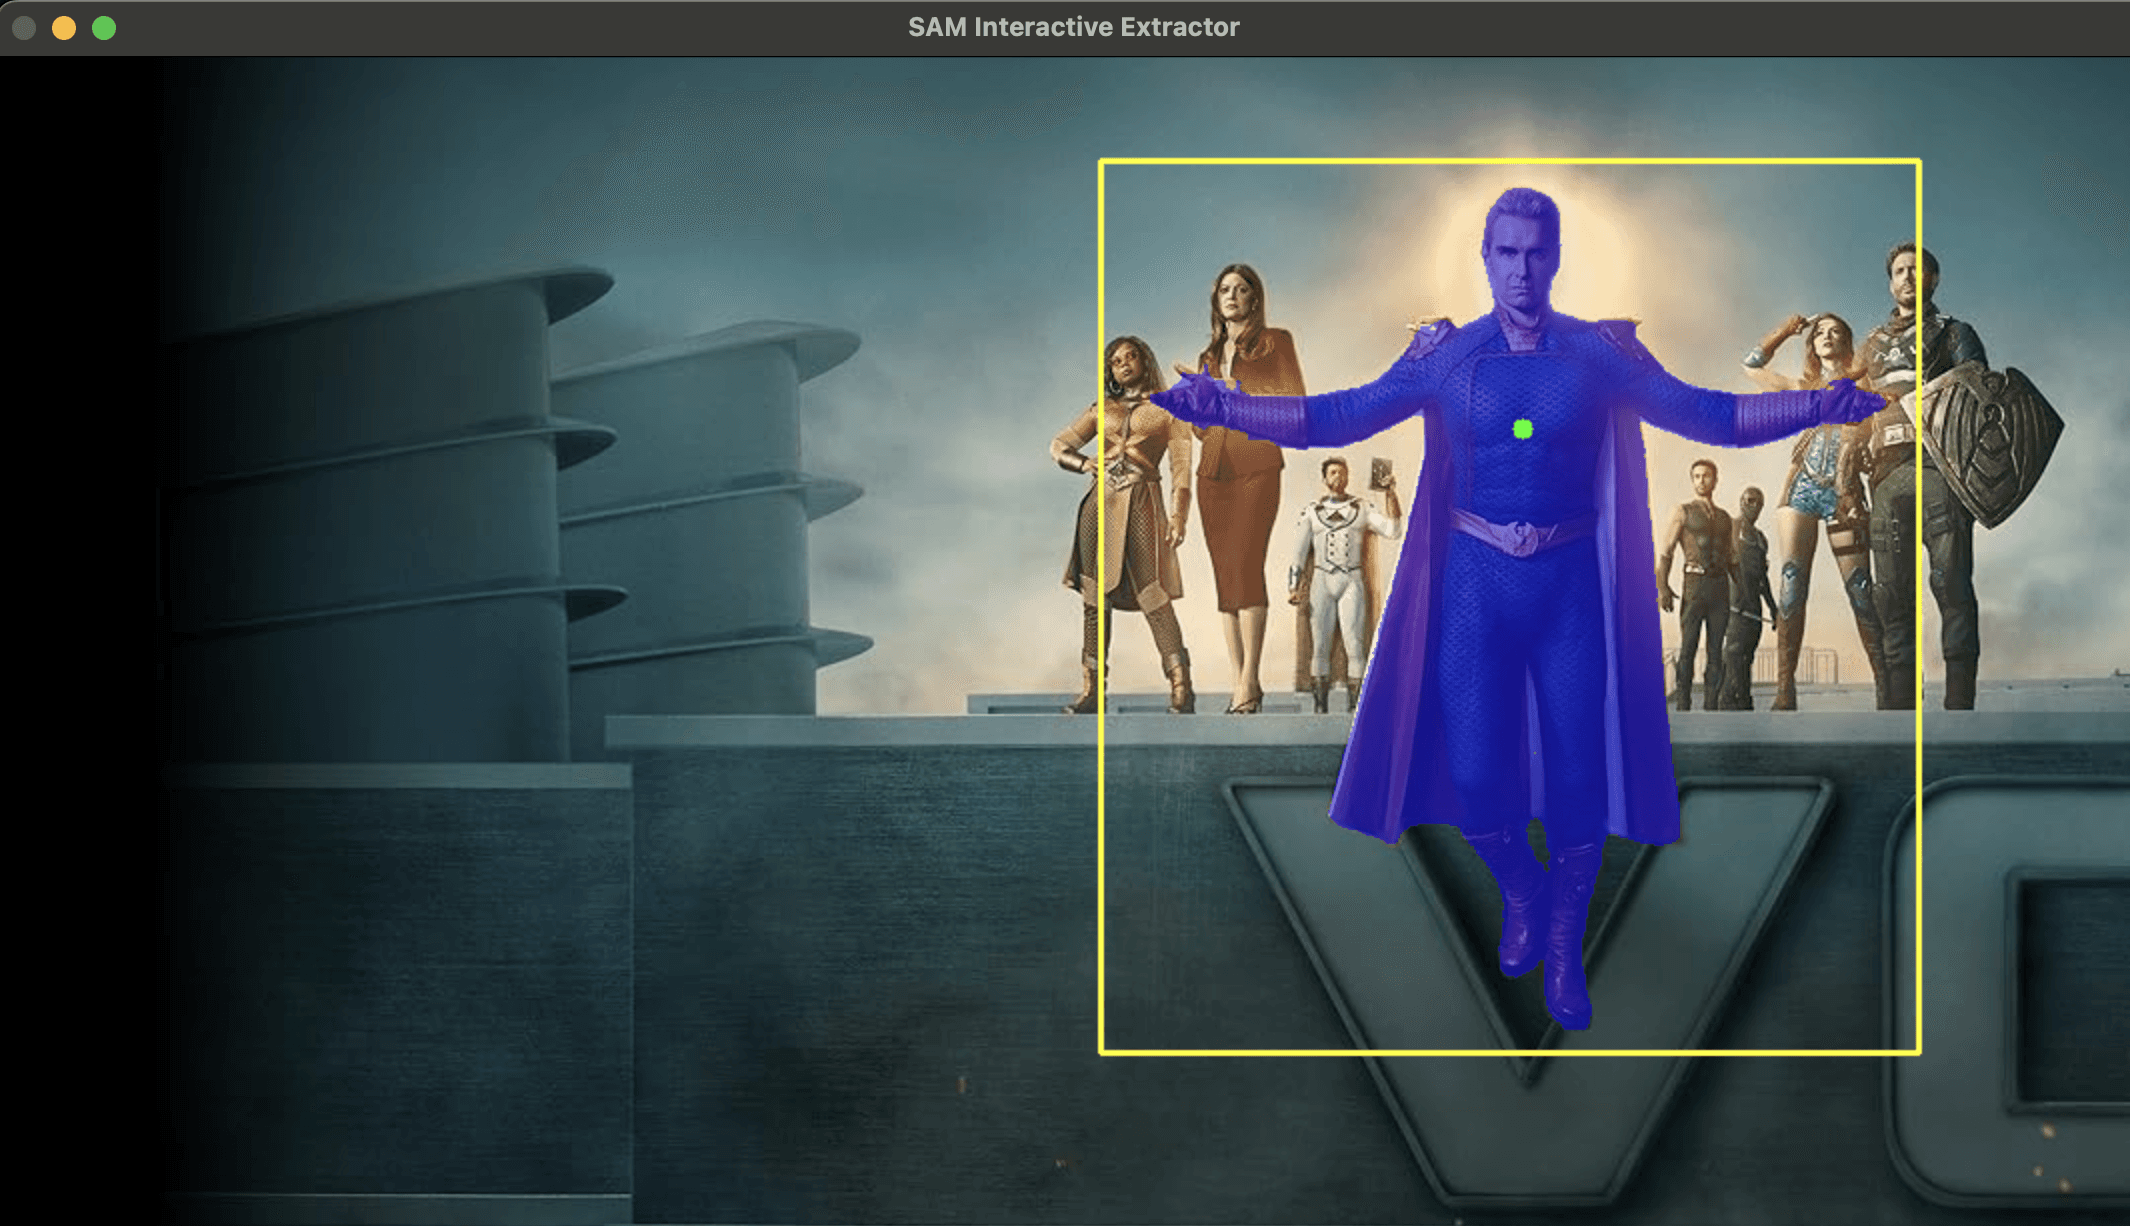
Clicked on character’s torso to set prompt point for Meta SAM model. SAM processed point input and generated initial foreground cutout. Extraction failed to isolate complete character, cutting off head and legs. Evaluated extraction quality and documented missing regions for prompt refinement.

Step 3: Improving the Model
The initial extractions were very poor quality, and I needed to investigate why the model was producing such bad results.
1. Testing Input Variations
Multi-Point Inputs: I tried providing multi-point inputs to guide SAM, which improved output slightly.

2. Bounding Box & Automated Debugging
Bounding Box: Next, I added a bounding box feature to help the model recognize the full subject, but the extraction performance remained poor.

Step 4: Fixing Aliasing (Jagged Edges)
Even with the core logic fixed, the extractions still suffered from poor visual performance around the edges.
1. The Problem: Aliasing
The “Stair-Step” Effect: The borders of the extracted assets were jagged and pixelated. In the visual effects industry, this is known as aliasing.

2. The Solution: Alpha Matting
Applied a subtle Gaussian Blur directly to final alpha channel in Python right before export to soften edges and blend smoothly.

Step 5: Adding UI Improvements
With extraction logic working perfectly, I needed a proper User Interface to make the tool easy to operate.
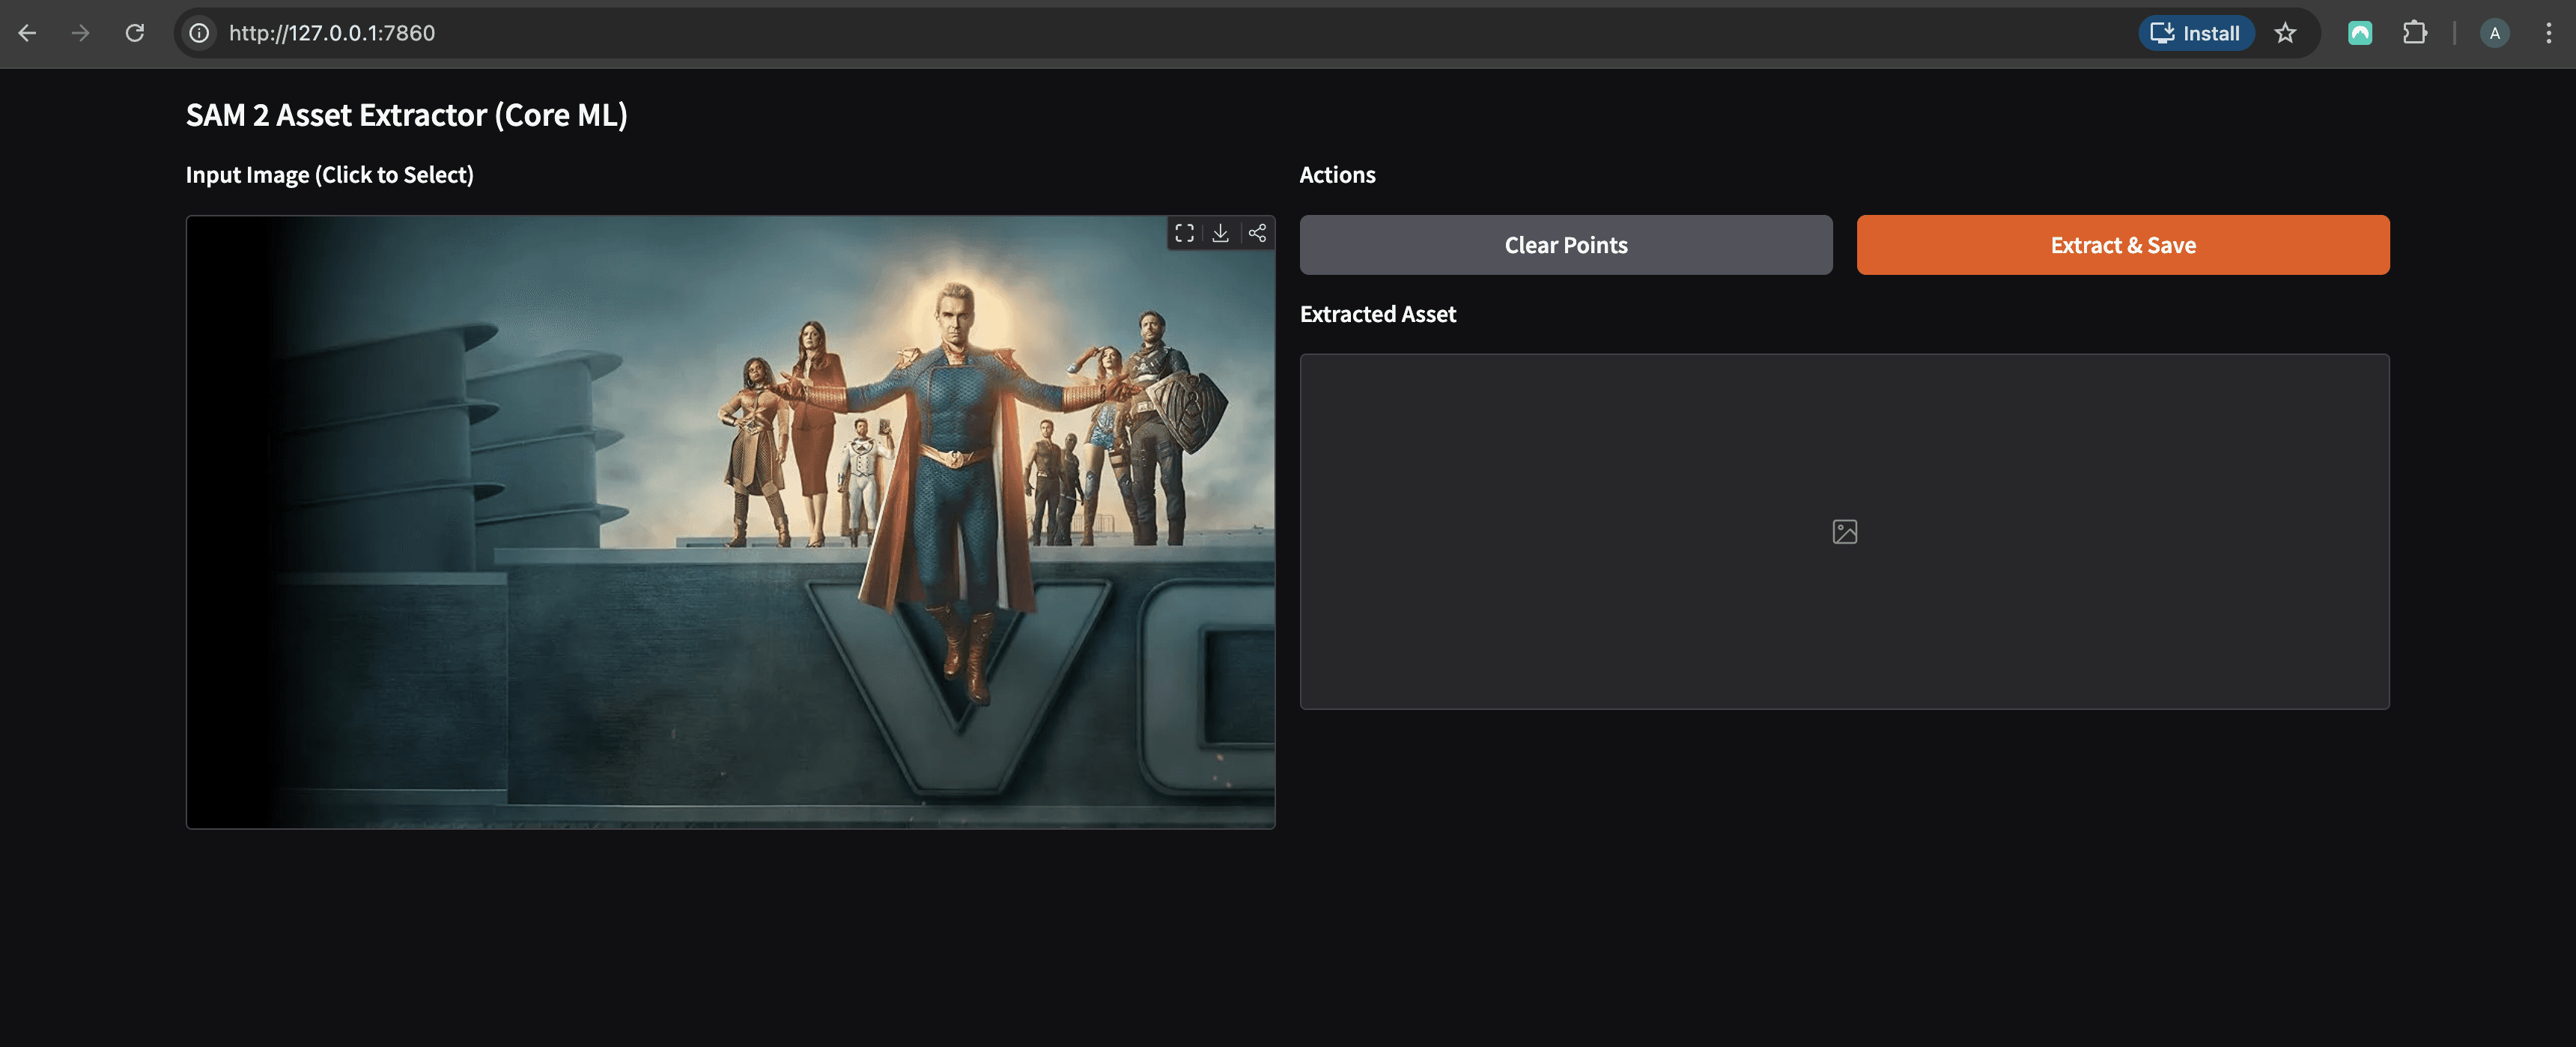
1. Prototypes & Gradio Interface
Added simple UI elements and migrated front-end to Gradio for multi-layer extraction.
2. Pivot to React & Prompt Boxes
Rebuilt front-end in React for dynamic parallax scrolling control and prompt input boxes.

Step 6: Background Reconstruction (Stable Diffusion)
Next, I used Generative AI to fill the empty background left by the extracted character.
1. Inpainting & Hallucinations
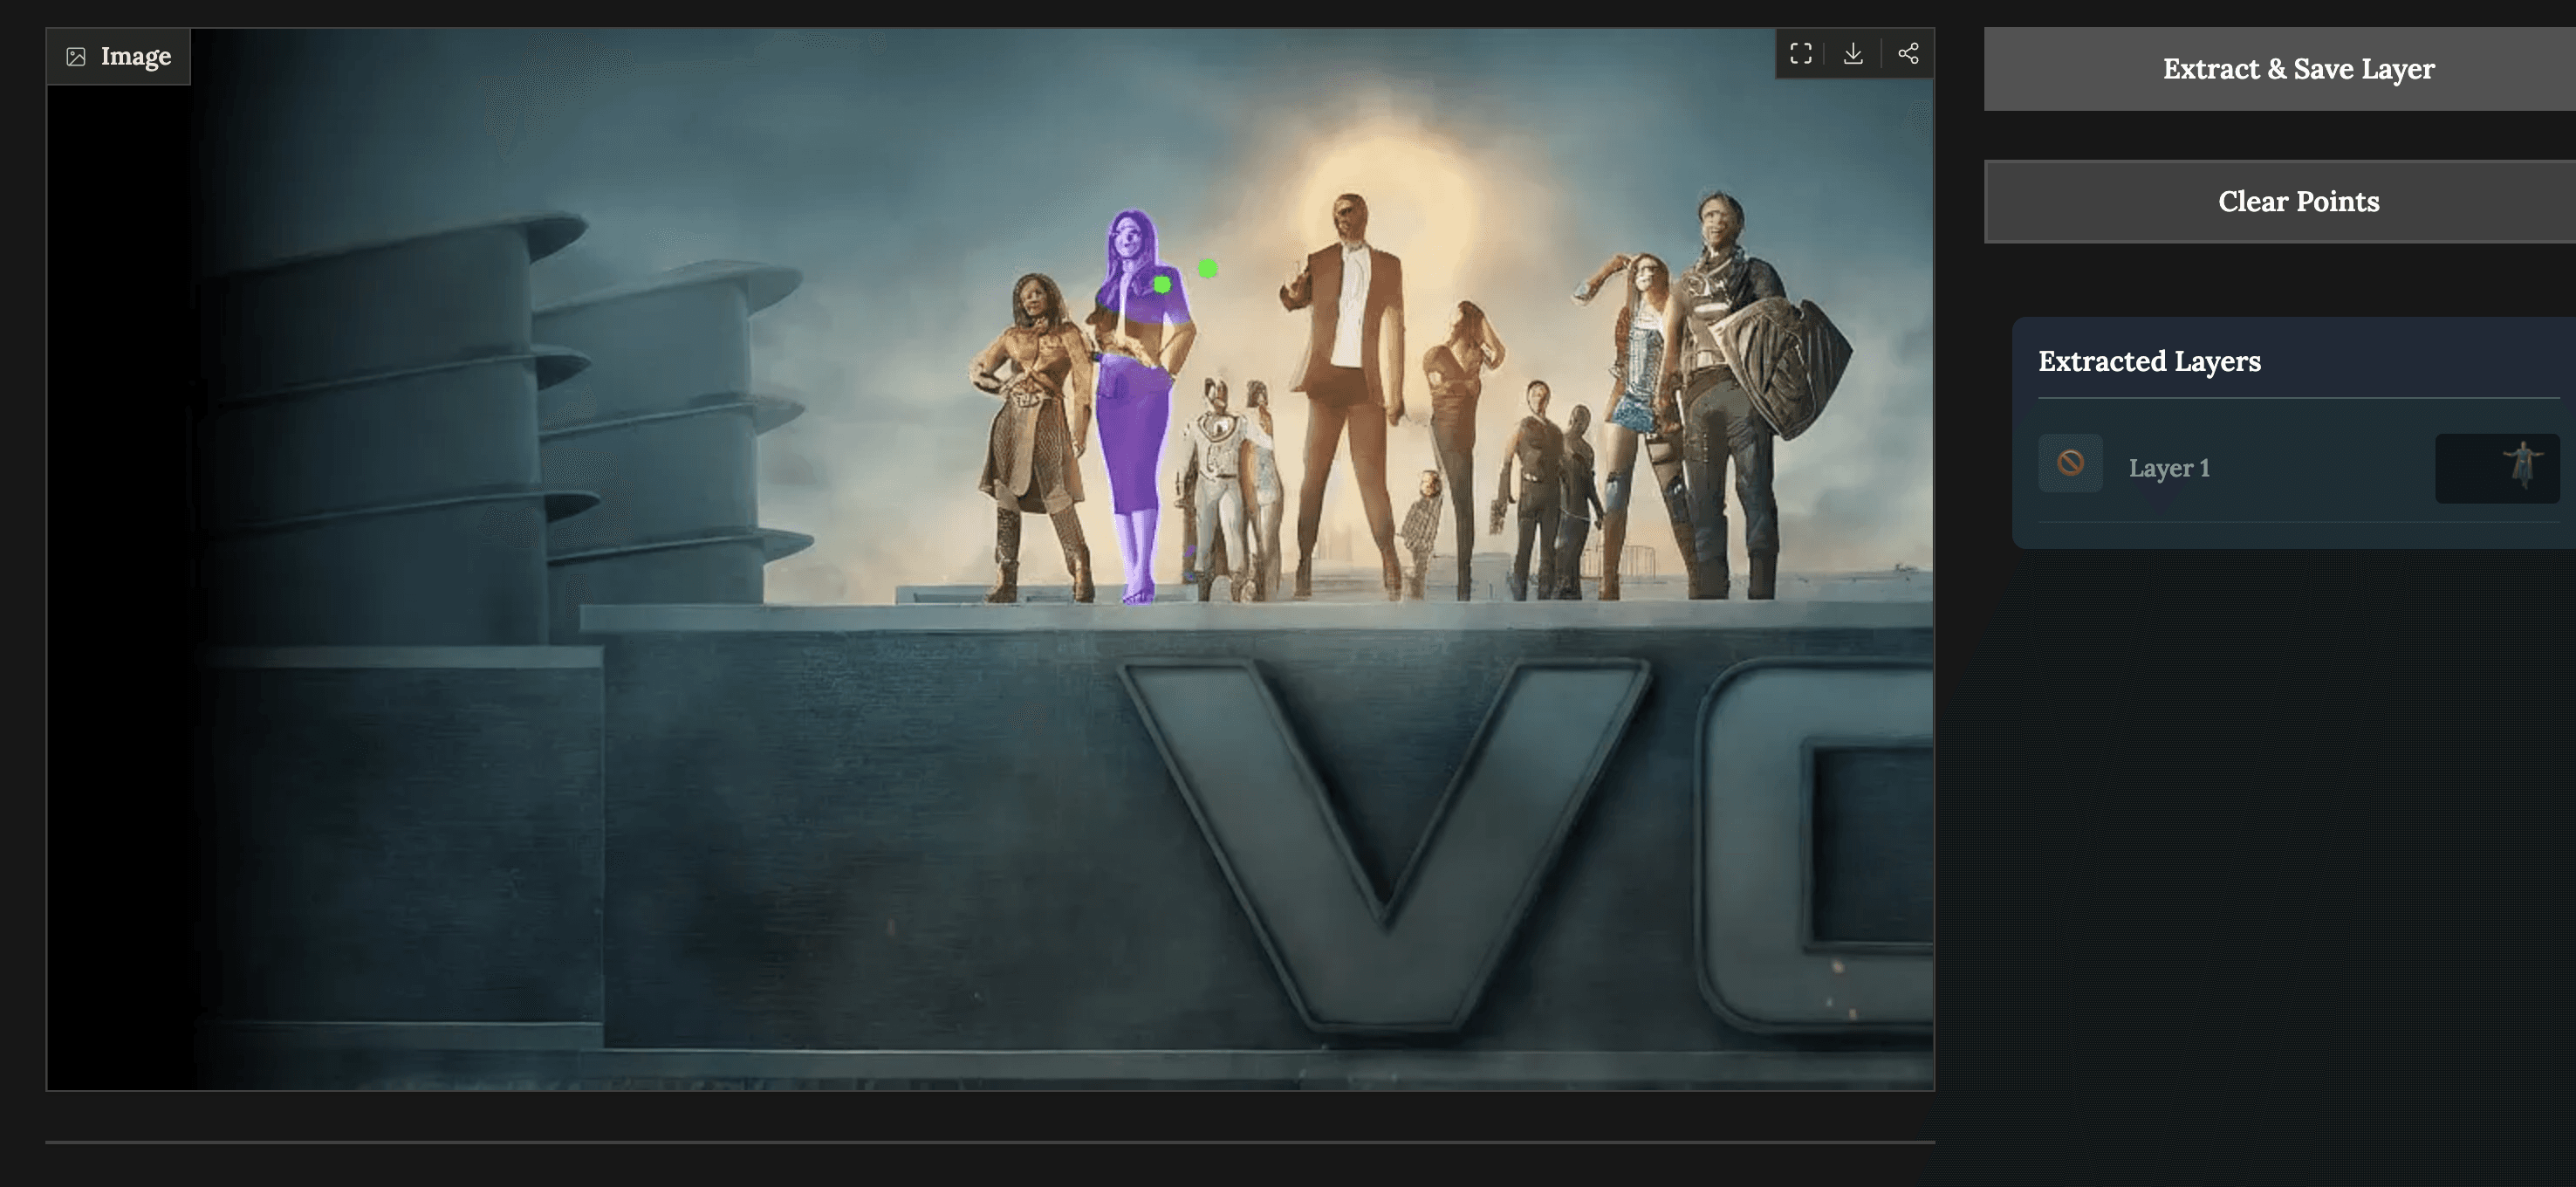
Integrated Stable Diffusion 1.5 into React interface to recreate missing background. Model hallucinated deformed characters in empty space.
2. Masking for Control
Applied strict mask to isolate background generation strictly to empty space.

Step 7: Improving the Inpainting
To stop the model from generating unwanted figures, I heavily engineered text prompts to force a clean background.
1. Prompt Engineering & Multi-Region Masking
Engineered strict positive & negative prompts and attempted multi-region prompting to isolate edits.

2. Limits of Stable Diffusion
Ghostly figures kept appearing, proving text-to-image models were unsuited for object removal.

Step 8: Migration to LaMa
With Stable Diffusion struggling, I needed a new approach to fix the background.
1. The LaMa Method
Pivoted to LaMa (Large Mask Inpainting) to heal masked regions using global structural image gradients without text prompts.

2. Complete Background Healing Result
LaMa produced clean, seamless background reconstruction without any hallucinations.

Step 9: The First MVP
With assets cleanly extracted and background rebuilt, final step was assembling interactive prototype.
1. Interactive Parallax MVP
Assembled dedicated Parallax tab, linked visual layer movements directly to mouse scroll, and completed a smooth 2.5D parallax experience.
Part 2: Scalable Creative Leadership & Production Playbook
This guide will walk you through the process of creating a dynamic, multi-layered parallax banner from a single static key art image.
Getting Started
To run the application, make sure you have all the dependencies installed and run the start script: 1. Download the project files onto your device and save them to a new folder. 2. Open a Terminal and change directory to the path of that folder. 3. Run the install script ./install.sh to download and install the required dependencies. Type ./install.sh into the terminal and press enter. 4. You are now ready to run the program! Run the program by typing ./run.sh and pressing enter.
Creating Your Parallax Banner
1. Upload Key Art
Begin by uploading your static key art asset into the tool. This will be the base image from which we extract the layers.

2. Extract Foreground Elements
Select the SAM (Segment Anything Model) tool from the toolbar. Click on the foreground elements in your image to select them. Once a foreground element is fully selected, click the ‘+ Foreground’ button to finalize it as a foreground layer. Repeat this process for all distinct foreground assets in your image. After all foreground elements are selected, run the Foreground Inpainting process to fill in the background behind them.

3. Extract Midground Elements
Repeat the exact same extraction process for the midground assets: Use the SAM tool to select midground elements. Finalize each selection by adding it as a midground layer. Run the Inpainting process for the midground to fill the background behind them.
4. Adjust Parallax and Motion Limits
Once both foreground and midground layers are extracted and inpainted, you can preview the parallax effect. You can now set the limits of motion independently for both the foreground and midground assets to get the exact dynamic feel you want.

5. Finalize Banner Assets
Check the full banner preview to see the final composition. Upload your own custom logo. Upload the top/bottom banners appropriate for the specific TV show or movie you are creating the banner for. Your dynamic parallax banner is now complete and ready to be exported!
